Edit Patient Data in OptosAdvance
OptosAdvance users who have been granted Edit Patient Study privileges can edit patient data. These edits include changing first and last names, birth dates, ID numbers, and referring physicians. Changes can be applied across all available studies for a patient.
- Log into OptosAdvance
Note: If you have OptosAdvance Cloud Backup or are viewing OptosCloud from a local instance*, then please follow these retrieval steps below:
*If logged into the following sites for image review, please proceed to Step 2.
Region URL OptosCloud US https://cloud.optos.com/ OptosCloud Canada https://ca.cloud.optos.com/ OptosCloud Europe https://eu.cloud.optos.com/ OptosCloud Australia https://au.cloud.optos.com/
- Search for the patient using guidance from the document titled: OptosCloud™ Searching for Patient Images
- Highlight or select the box that precedes the Patient Study you want to retrieve

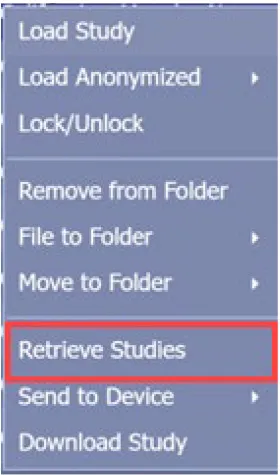
- Right-click and select Retrieve Studies from the drop-down list that appears

- Click OK in the Retrieve Studies dialog box to confirm DICOM retrieval

- From the Patient Study Directory, right-click a study and select Edit Patient/Study
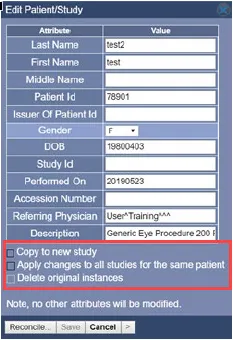
- Make the necessary changes to the patient and study information
Note: Depending on your version of OptosAdvance, you may need to click on the pencil icon beside the Patient Name field to modify additional demographic details:

- Select Copy to new study to save your changes to a new study. You may want a new study if you want to simply anonymize the study. To make changes to the original study, do not select this option.
- Select Apply changes to all studies for the same patient to apply your changes to all studies for this patient.
- Select Delete original instances if you are saving your changes in a new study and want to delete the original study.
- Select Save
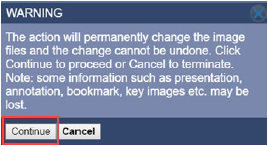
- You will receive a warning that the action will permanently change the image files and the change cannot be undone. Click Continue to proceed.

Additional Help
If you are looking for further support or have additional inquiries, we encourage you to visit our Contact Us page. Our dedicated support team is readily available to assist you with any questions or concerns you may have.