Viewing Patient Studies in OptosAdvance

Reviewing Patient Studies

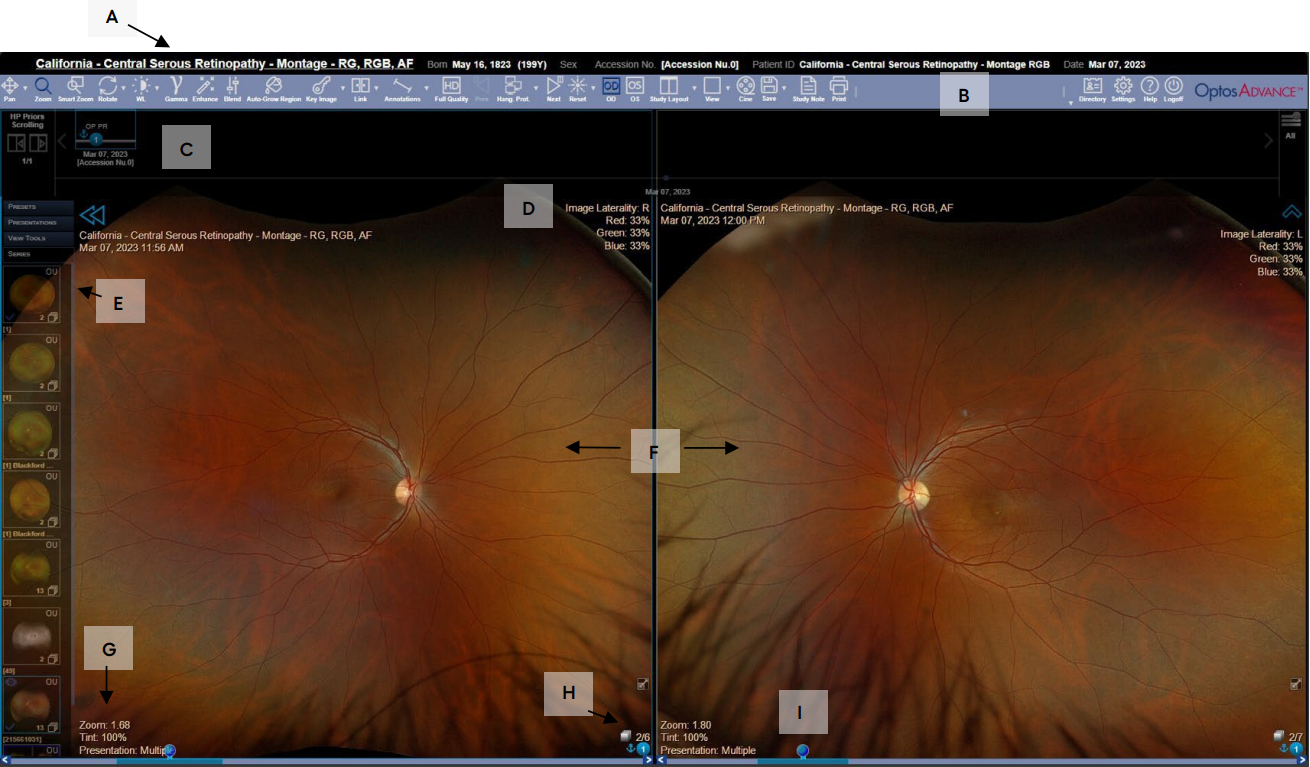
Double-click the icon on the desktop for OptosAdvance to take you to the login screen. Once you are logged in you will see the Patient Study Directory. Locate the desired patient study and click on it to open for review. In most cases, images are presented with a 1 × 2 study layout with right eye images in the left viewport and left eye images in the right viewport. Click the Next button on the toolbar to view other image types captured and prior studies if taken.

oa image review

The View dropdown menu on the Toolbar allows for you to change the current view of a selected image. Three Split will show your current image as well as the red and green channels. Red will show the choroidal view of the current image. Green will show the sensory retina view of the current image.

3D Wrap in OptosAdvance is a useful patient education tool that is activated by clicking the 3D Wrap icon. When viewing an image in 3D you may click the View Tools tab located on the left side panel to access different views and conditions that can be applied to the image. Clicking the Rotate icon from the Toolbar allows you to rotate the image to the desired orientation while holding down the left mouse. To turn off rotate feature click on zoom on the Toolbar. Click on View Tools on the left side menu to open up the tools included with 3D Wrap. Different views and conditions can be applied to the image: View, Refractive Error, Rays, Eye Lens, and Cataract can all be adjusted for patient education.

Another useful feature in OptosAdvance is SmartZoom, which can be employed by clicking the middle scroll wheel while the cursor is over an image or selecting the icon on the Toolbar. An overlay window will be applied onto the center of the image which will allow you to increase the magnification within the overlay using the left mouse button zoom feature. You may also adjust the size and position of the overlay. To resize the box, drag the corners of the box. Drag the sides of the box to move to any area on the image. You can even move it into another viewport if desired.

Different images of the same eye or different series of the same eye (ex. af, fa or icg) may be brought into the overlay by pressing the left mouse button and dragging it into the SmartZoom window and releasing the left mouse button to drop the image(s) in. The green dot at the bottom left of the overlay indicates that the vessels have been registered correctly. You can blend through the overlayed image by holding down the scroll button and moving the mouse towards you and away from you to change the transparency of the image. Prior imaging sessions can be dragged into the SmartZoom overlay as well for comparison. Once a prior visit is dragged in, the series thumbnails on the left sidebar would reflect the prior visit. To turn off SmartZoom, simply tap the middle scroll wheel outside the smart zoom window or click on the SmartZoom icon on the Toolbar.

Download the instructions on how to view patient studies in OptosAdvance.

OA Image Review Image Display


Additional Help

If you are looking for further support or have additional inquiries, we encourage you to visit our Contact Us page. Our dedicated support team is readily available to assist you with any questions or concerns you may have.